Detecting and bypassing anti-Adversary-in-the-Middle (AitM) tokens
Within the Advanced Red Teaming (ART) framework it is possible to skip the initial compromise phase of a red team engagement and start from a “Assumed Compromise” scenario. However phishing attacks are commonly used to breach the perimeter. In this blog, we will discuss a specific detection method for Adversary-in-the-Middle attacks (AitM) commonly used by adversaries such as ransomware groups to gain access to the organization’s data. Then we explore how this method can be bypassed. First, we must understand what AitM-attacks are and how they are commonly used to steal login credentials and (MFA) tokens.
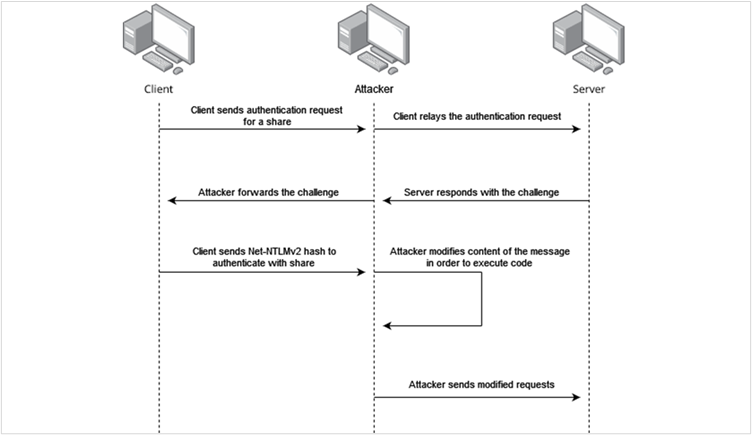
AitM-attacks are highly effective as they allow an attacker to position themselves between the victim and the target, which can be a legitimate service such as the Microsoft login page. From this position the attackers are able to capture the network traffic, retrieving the e-mail, password, cookies and session tokens. By possessing the tokens, we can bypass Multi-Factor Authentication (MFA). This highlights the importance of detecting and mitigating such attacks.
Implementing Adversary-in-the-Middle detection with Canarytokens
Some research has already been done into how certain tokens can be implemented to detect Microsoft 365 AitM attacks, such as these from Zolder.io and Clarion. The detection method works by implementing a token in a hidden background image URL within the company branding CSS file for the Microsoft login page. This company branding is commonly used by organizations to implement their own company logo and background. Whenever a user enters their e-mail on the Microsoft login page at https://login.microsoftonline.com, the web browser loads the company branding files, if they have been configured. The example given in the research, lists the CSS code as shown below. To test this implementation, we used the CSS cloned website function from https://canarytokens.org to get a token. During the configuration set the protected site value to https://login.microsoftonline.com/. This blog is not about the implementation of these tokens. If you want to know the specific steps of how this can be implemented, check out the research in the previously linked blogs from Zolder or Clarion. An example configuration of such background-image in the company branding would be:
.ext-footer
{
background-image: url(‘<YOUR_CANARY_TOKEN>’);
background-size 0 0;
}
Figure 1 – Canarytoken in a hidden background image in the Custom CSS file.
Typically, when a user logs into Microsoft, the referer header contains the value https://login.microsoftonline.com/. However, when using a reverse proxy tool such as Evilginx the referer header will be set to the value of the phishing domain. In our example the phishing domain is https://login.fake.com, thus the referer header will be:
Referer: https://login.fake.com
When the Referer header differs from the one configured as the protected URL during CSS Canarytoken generation, Canarytokens will generate an alert. This occurs due to a mismatch between the Referer value (https://login.fake.com) and the protected domain (https://login.microsoftonline.com). Below is an example of such an alert:

Figure 4 – Detection token in the hidden background image.
Detecting anti – adversary-in-the-middle tokens
If we want to bypass these tokens, we should check how these tokens are loaded into the web browser. First, we need to identify a way to load the company brandings files for the target tenant. This can easily be done without having any valid email for the tenant by simply adding the whr parameter to the URL. In the case of NVIDIA, the complete URL would then be: https://login.microsoftonline.com/?whr=nvidia.onmicrosoft.com. When visiting the page, the company branding will load without triggering a sign-in event. However, if you log in using a valid e-mail, it would register an incomplete sign-in.
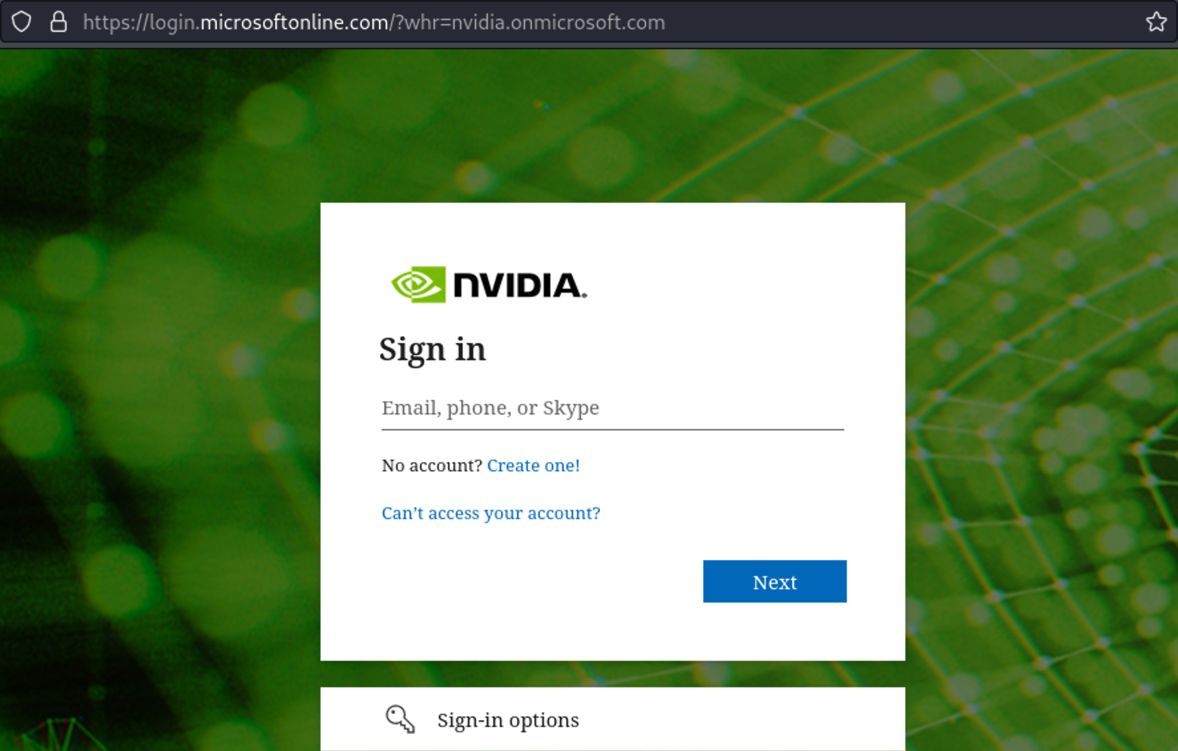
Figure 3 – Using the whr parameter to load in the company branding files.
Now how do we find out where these detection tokens are stored? By opening the network tab in the developer tools, we can filter for the word customcss. In the example of NVIDIA, no custom CSS file is used for the company branding, as they only configured a custom logo and background. However, in our development tenant we have set up a custom CSS with a canary token in the hidden background image, as can be seen in the customcss response below.
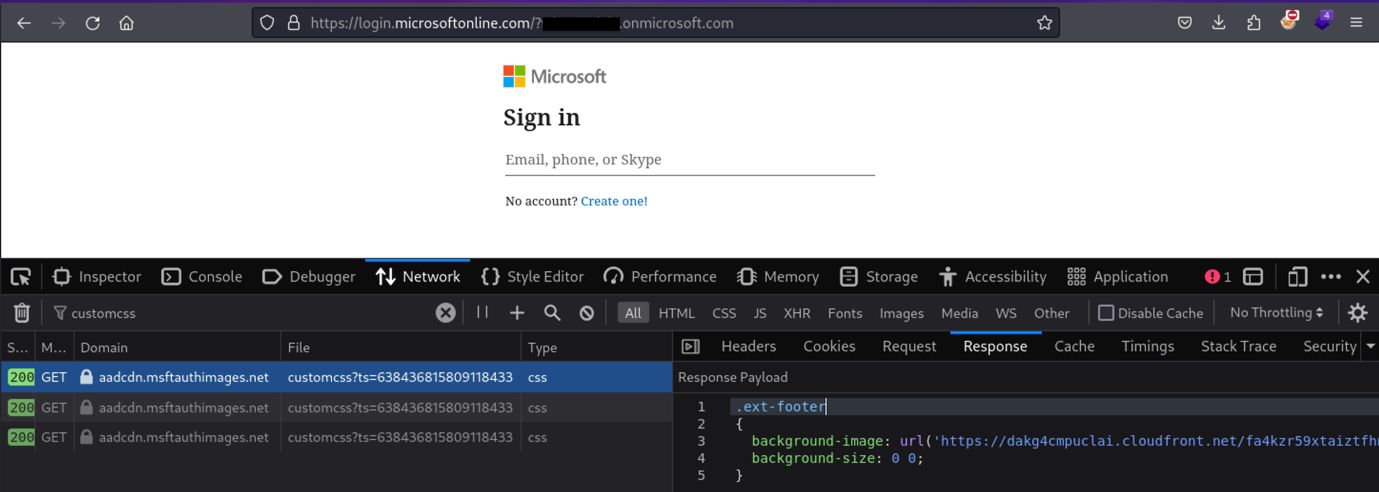
Figure 4 – Detection token in the hidden background image.
We have developed a simple tool to make it easier to locate these tokens. This script parses the custom CSS file and identifies any URLs contained within them. If it finds a custom CSS file without any URLs, it will output the entire CSS for manual review, just to ensure nothing is missed. If you want to play around with it, you can clone it from here: https://github.com/HackDefenseNL/aitm-detect. Below is an example output from our developer tenant and the DHL tenant which has a custom CSS implemented but no background image URLs:
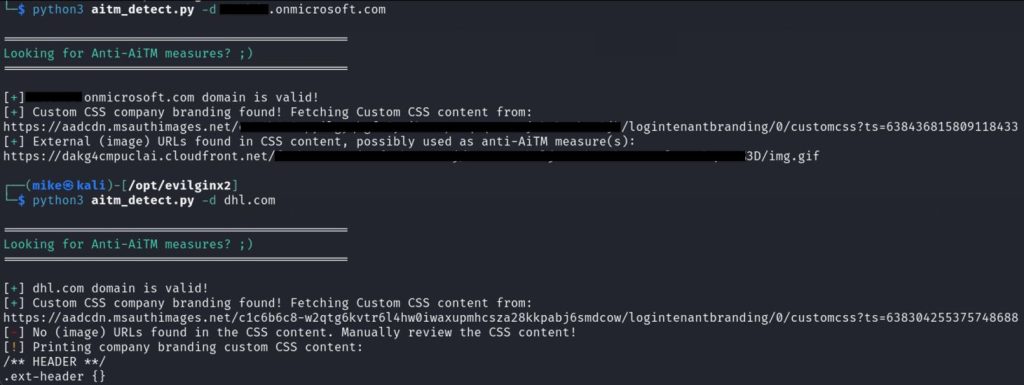
Figure 5 – Automated discovery of detection tokens in company branding CSS files.
Bypassing anti-Adversary-in-the-Middle tokens
The most interesting part of our research is figuring out how we can bypass these tokens. Because we are proxying all the content, we have multiple solutions available to us. One way is by changing the value of the referer header to the normal value: https://login.microsoftonline.com/. However, Evilginx does not seem to currently support this. Another solution is by inserting our own Content Security Policy (CSP), which blocks the token from being loaded into our proxied Microsoft 365 page.
We can simply create a new sub_filter in our Microsoft 365 Evilginx phishlet. These sub_filters can be used to search for certain content in HTML, CSS and JS files and then replace it with a new value. This exactly what we need to add our custom CSP to the proxied page. There are likely several options to implement this, but in our approach, we search for the first <head> HTML tag and replace it with a new one. Following that we add a new meta tag, containing the CSP and set the MIME type to search for text/html content.

Figure 6 – Sub_filter with the CSP bypass in the Microsoft 365 phishlet for Evilginx.
If you remember from the first paragraph, the detection tokens are implemented through the background-image url(<TOKEN URL>), so the content that we should be blocking are images. In the CSP this can be accomplished with the content option img-src. Obviously, we do not want to block all the images because that would make the page look completely different.
When using company branding files for the logo, background, etc., they are loaded from Microsoft’s own domain. However, there is not just a single domain, different domains are used to load different kind of company branding files and Microsoft’s own images. In the example below the NVIDIA image is loaded from aadcdn.msftauthimages.net:
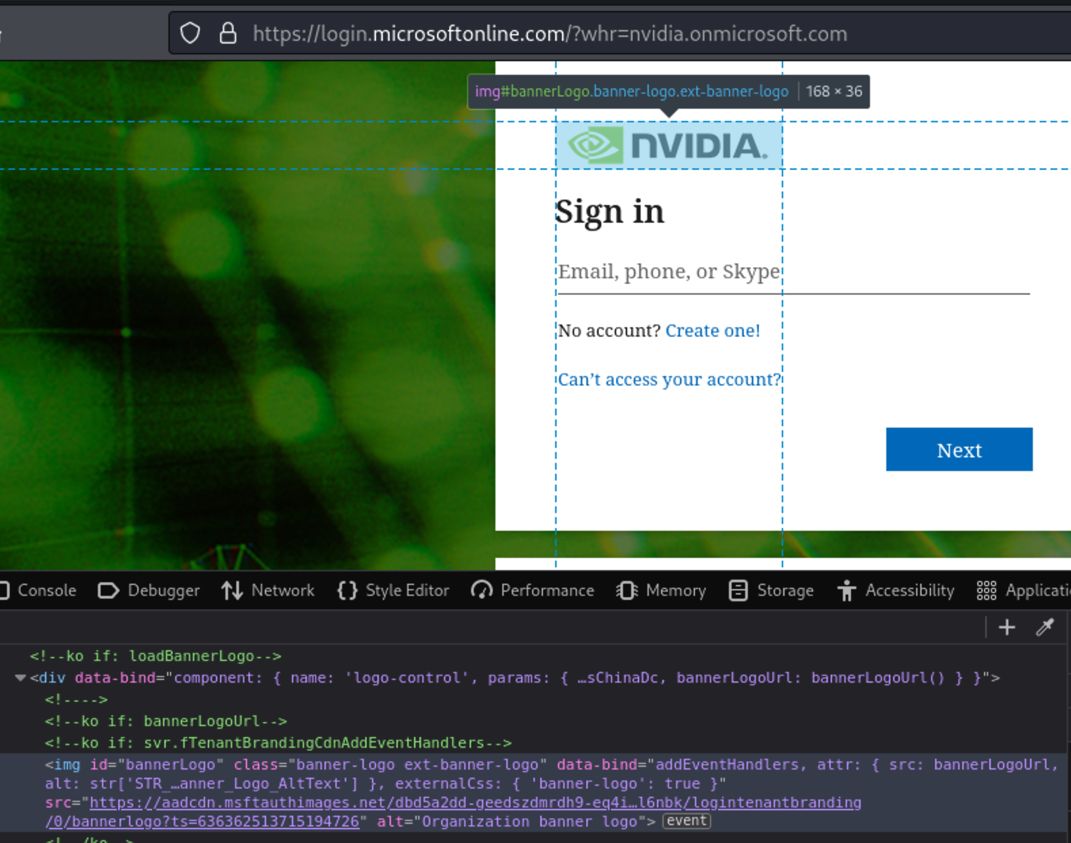
Figure 7 – Example of a company branding file loaded from Microsoft’s domain.
From my testing with different company branding files, it seems to be the following domains that are used to load the images:
⦁ aadcdn.msftauthimages.net
⦁ aadcdn.msauthimages.net
⦁ aadcdn.msftauth.net
⦁ aadcdn.msauth.net
If you add these to your CSP you should end up with the following sub_filter:
sub_filters:
– {triggers_on: ‘login.microsoftonline.com’, orig_sub: ‘login’, domain: ‘microsoftonline.com’, search: ‘<head>’, replace: ‘<head><meta http-equiv=”Content-Security-Policy” content=”img-src aadcdn.msftauthimages.net aadcdn.msauthimages.net aadcdn.msauth.net aadcdn.msftauth.net”>’, mimes: [‘text/html’]}
Note that if you use something like frameless BiTB, you should also add your own phishing subdomains (e.g. login.fake.com) to the CSP, unless you’re not using any images on your domain.
We could also take a look at the Microsoft documentation to see which domains are used to load content during the portal authentication: https://learn.microsoft.com/en-us/azure/azure-portal/azure-portal-safelist-urls?tabs=public-cloud#azure-portal-authentication
Conclusion
Company branding files provide an easy way to implement tokens which can be used to detect AitM attacks. However, these company branding files are publicly accessible and can therefore easily be checked for the existence of these tokens.
By using the Evilginx phishlet filters we managed to implement a Content Security Policy, which blocks the tokens from being loaded into the proxied Microsoft 365 page, effectively bypassing this specific AitM detection method.
This is just the first blog in our Red Team series. In the next one we will talk about Modern phishing techniques for Microsoft 365.